

Tutorial
Introductory
Voice notebook can be used to input text by voice and transfer audio files to text (make transcription).
Installation
Go to the page of the voice notebook on App Store and install it.
Requirements
Works on devices with iOS 11.0+.
The App requires Internet connection in most cases. Also Dictation or Siri must be enabled in your device settings (or both are enabled).
Voice typing
List of notes
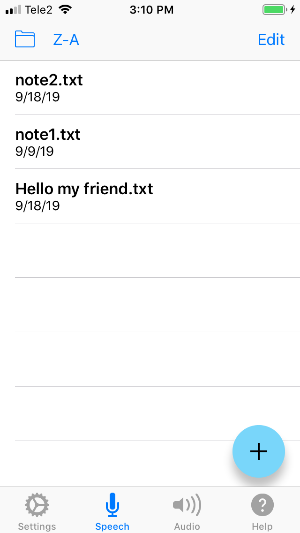
To create a new note, click on the plus button.
To select an existing note, click on the title of the note.
To rename a note, long press the name of the note.
To delete a note, select the Edit button in the navigation bar than delete the note.
Speech input window
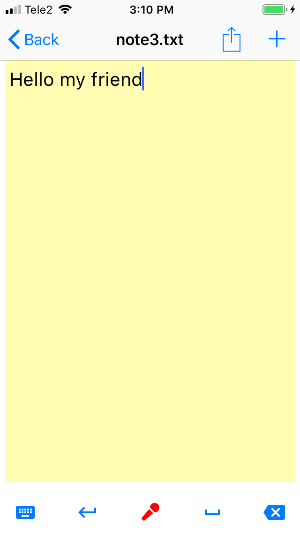
Press the button with the microphone for dictation.
To edit the text, you can open the keyboard, or use the erase, space bar or retun buttons.
To send the text, select the Send icon in the navigation bar.
Transcribing
List of audio files
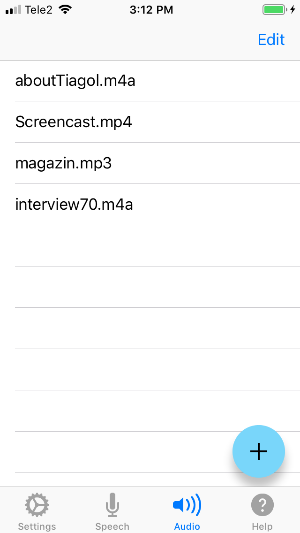
To import an audio file for transcription, click the plus button.
With each audio file, a text file is associated with its transcription. All actions (delete, rename) for the audio file are duplicated for that file.
To select a file for transcription, click on the name of the file.
To rename an audio file, make a long press on the file name.
To delete an audio file, select the Edit button in the navigation bar and than delete it.
Transcription window
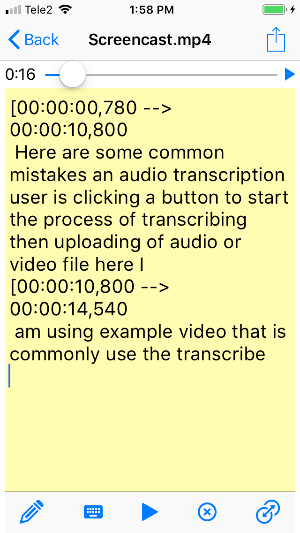
At the top of the window is a slider that shows the current position in the audio file. Moving the slider manually you can change the playback place in the audio file.
Below are the transcription control buttons:
the leftmost button switches the mode of transcribing / listening to audio recordings;
the second left button displays the keyboard;
the third button on the left enables audio playback;
the rightmost button is used to translate timestamps in the received transcription into the Youtube subtitle format and vice versa;
the fouth button on the left remove timestamps in the transcription.
In the mode of listening to audio recordings, if timestamps are set in the transcription, when you click in the transcription text, the audio pointer is set to the beginning of the closest timestamp.
To send the text, select the Send icon in the navigation bar.
Settings
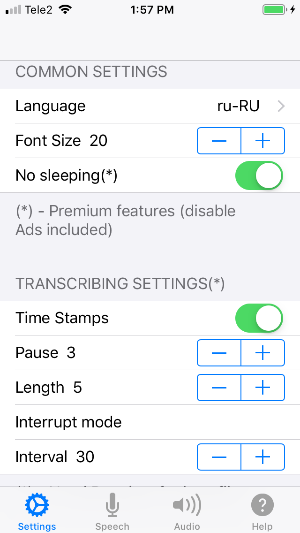
Common settings
In common settings, the voice input language, the font size of voice notes and transcriptions are selected. In addition, you can disable the auto-lock screen (No sleepping). Last option is enabled only in Premium.
Transcribing settings
The Time Stamps switch enables time stamping when transcribing audio.
Spinner Pause sets the maximum allowed pause time in speech in each subtitle. If this time is exceeded, a new subtitle will be started.
Spinner Length sets the maximum allowed time of one subtitle, if this time is exceeded, a new subtitle will be started.
The spinner Interval sets interruptions in transcription proccessing. Setting it to smaller is useful in low quality audio, it prevent its individual pieces from disappearing.
Premium
Enabling the Premium mode removes ads from the app and enables the No sleeping option. If No sleeping is set than the recording does not stop during long pauses in speech and the screen does not go to Sleep mode. Premium alse remove the limit for the length of transcribing audio files.
The Restore button can be used to restore purchased premium features if for some reason they are not automatically enabled. Recovery requires a connection to the Internet.
Troubleshooting
If you have not found the answer to your question, please contact the developer and we'll try to resolve your issue.